Continuation of the 1st part
https://bitbag.io/blog/api-platform-how-to-build-a-functional-rest-application-within-a-couple-of-minutes-part-1
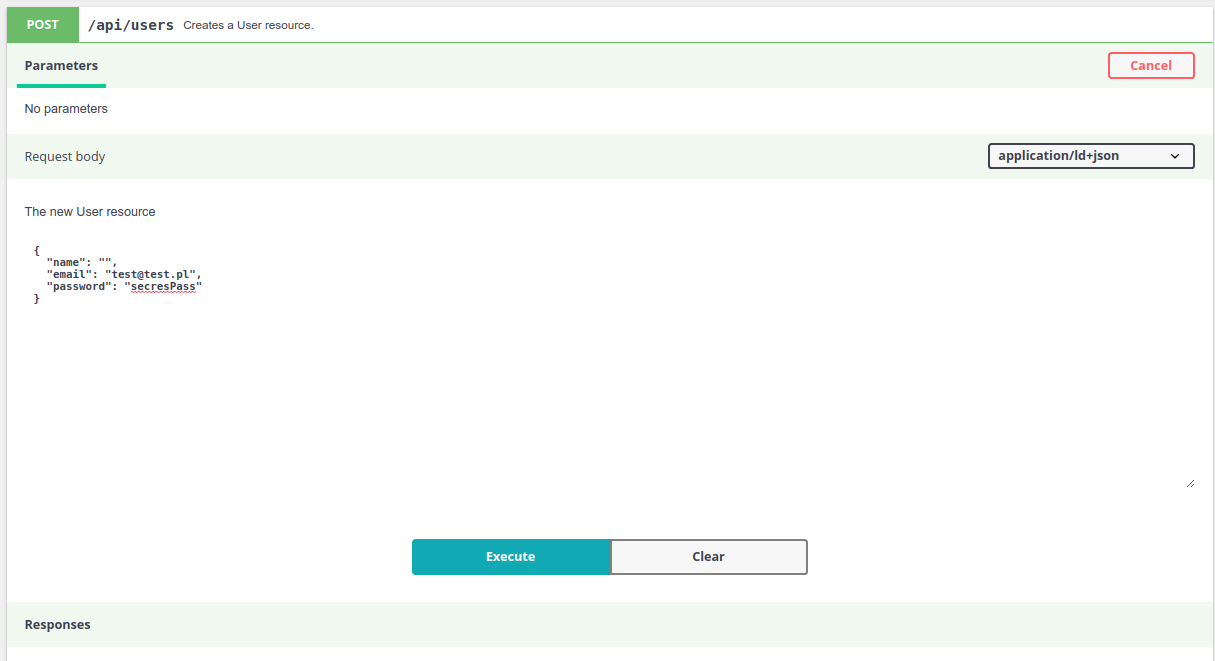
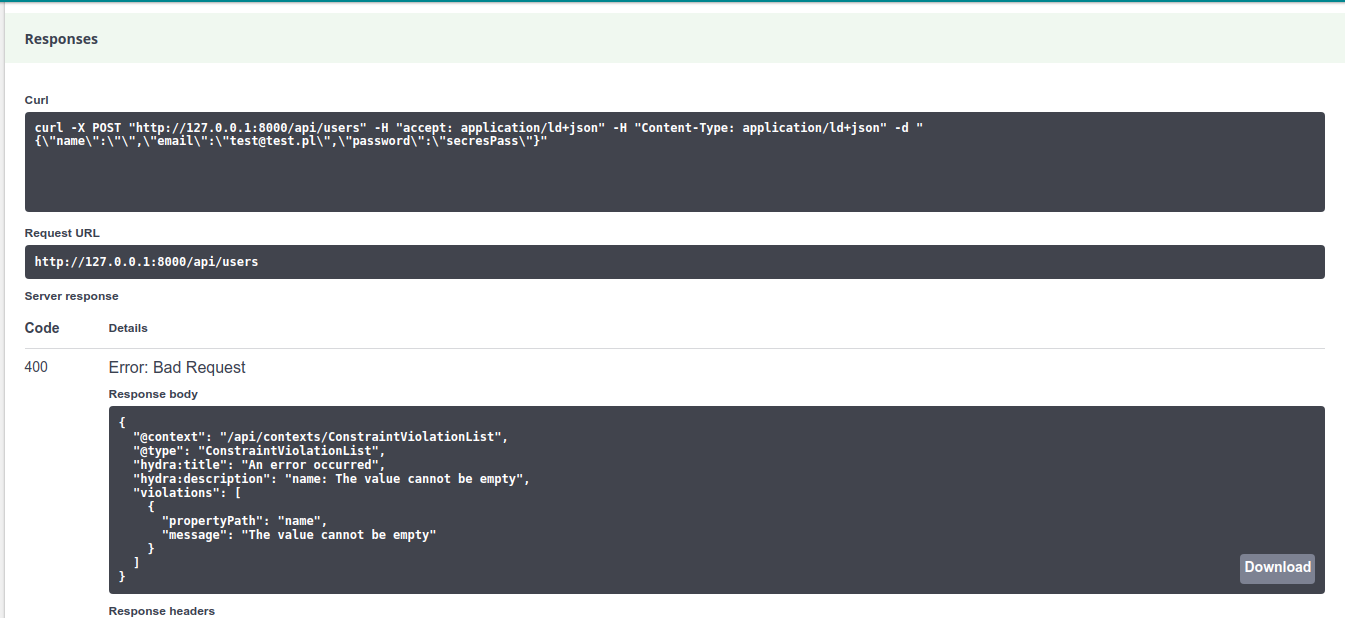
Click “Execute”. The effect is shown below.

Permissions [READ] [WRITE]
Our user has confidential fields as password, which we wouldn’t like to share. API Platform allows us to restrict selected data in a simple way. Let’s limit our user to display only two fields: name and e-mail. Add the configuration.
- config/api_platform/user.api.yml
AppEntityUser:
 attributes:
   normalization_context:
     groups: ['read']
   denormalization_context:
     groups: ['write']
We have added two attributes: normalization_context and denormalization_context. Normalization is responsible for retrieving data, denormalization for sending and assigning data to the appropriate group. Then, add fields configuration.
- config/serialization/User.yml
AppEntityUser:
 attributes:
   name:
     groups: ['read']
   email:
     groups: ['read']
We have assigned permissions for the fields “name” and “e-mail” as [“read”]. Now, we are going to test its functionality. Open the link 127.0.0.1:8000/api in the browser and choose the action to display users.

We have received a result of our user’s query only with those fields, which we declared above. ?
Validation
Let’s add a username validation to the project, as shown below.
- src/Resources/config/validation/User.yml
AppEntityUser:
   properties:
       name:
           - NotBlank:
               message: "The value cannot be empty"
           - Length:
               max: 250
               maxMessage: "The value cannot be longer than 250 characters"
The user name can’t be blank or longer than 250 characters.
API Platform will do everything on our behalf. Basing on the standard validation, it will return the corresponding HTTP error code with the message.


JSON Web Token (JWT) Authorisation
Let’s add authorisation to the application. In our case, we will use JWT. In the beginning, let’s run the command to install bundle JWT.
composer req lexik/jwt-authentication-bundle
Next, generate certificates, private key, and public key. Let’s note the certificates’ generation place. Run a command in this terminal.
openssl genrsa -out config/jwt/private.pem -aes256 4096
openssl rsa -pubout -in config/jwt/private.pem -out config/jwt/public.pem
Then we add certificates in the env.local file.
###> lexik/jwt-authentication-bundle ###
JWT_SECRET_KEY=%kernel.project_dir%/config/jwt/private.pem
JWT_PUBLIC_KEY=%kernel.project_dir%/config/jwt/public.pem
JWT_PASSPHRASE=xxxxxxx
###< lexik/jwt-authentication-bundle ###
JWT_PASSPHARE – it’s the password we have inserted during private key generation
Another step is to configure security.yaml file. Let’s add the encoders section to indicate the authorization entity. As a property field, we can choose any field, e.g. e-mail. We choose field “name” and next configure firewalls adding API. Then, restrict access in the access_control.
- config/packages/security.yaml
security:
   encoders:
       AppEntityUser: bcrypt
   providers:
       database:
           entity:
               class: AppEntityUser
               property: name
   firewalls:
       dev:
           pattern: ^/(_(profiler,wdt),css,images,js)/
           security: false
       api:
           pattern: ^/api
           stateless: true
           anonymous: true
           json_login:
               check_path: /api/login_check
               success_handler: lexik_jwt_authentication.handler.authentication_success
               failure_handler: lexik_jwt_authentication.handler.authentication_failure
           guard:
               authenticators:
                   - lexik_jwt_authentication.jwt_token_authenticator
       main:
           anonymous: true
   access_control:
       - { path: ^/api/login, role: IS_AUTHENTICATED_ANONYMOUSLY }
       - { path: ^/api, roles: IS_AUTHENTICATED_FULLY }
At the end, add new routes, which in accordance with the above config, will be responsible for generating a new token.
- config/routes/jwt.yaml
api_login_check:
     path: /api/login_check
Let’s test its functionality. At this point, we will use the Postman tool, which we highly recommend. To generate a new token in Postman, insert an endpoint http://127.0.0.1:8000/api/login_check and

After the correct validation, we will receive a response with the generated token.

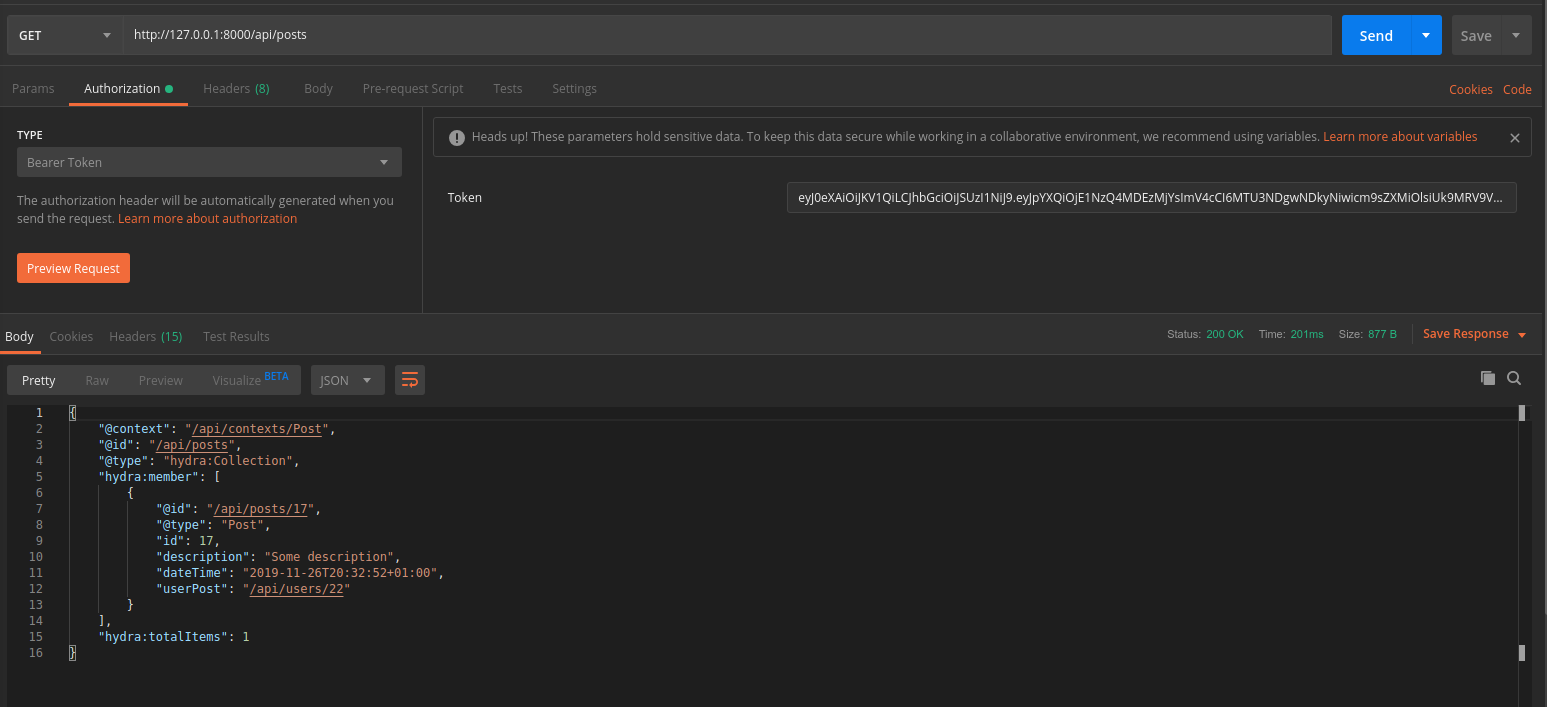
Let’s use it to download posts now. In the Postman, in a tab “Authorisation” choose type as Banner Token, in which we will insert our new token.

As a result, we have received a list of our posts. ?
Summary
To sum up – it’s worthwhile! API Platform is an excellent tool, which can boost your work. We come across basic functions from quick and simple entity implementation to validation and permission assignment. We recommend spending a while using this tool and getting to know its possibilities better.
Bonus
<div class="rtb-text-box is-blue-50"> As a bonus – I share with you a project on a Github.</div>


