

Writing tests for your Vue application is very important because it helps you find what you didn't see before you ship it to the final user.
We can distinguish two main types of tests: unit tests and E2E (end to end) tests. This article will be about E2E tests using Cypress, but for writing unit tests for your Vue apps I would recommend Vitest (if you are using Vite) or Jest.
For the best results, you would want a mix of both, so you can test smaller bits of code with unit tests and test how all these bits work together with E2E tests.
Getting started
As the title says, we will be using Cypress for our testing. Nevertheless, it shouldn’t be treated as a complete guide on Cypress, as we will only cover going from setup to running a basic test. If you want to learn more about Cypress you should go to Cypress docs.
Let's begin with the Cypress installation. I will be using Yarn as my package manager, but you can use any other package manager.
If you are using create-vue it's really simple, you just have to run yarn create vue <app-name> and you will have a choice to add Cypress:
Vue.js - The Progressive JavaScript Framework

✔ Add TypeScript? … No / Yes
✔ Add JSX Support? … No / Ye
✔ Add Vue Router for Single Page Application development? … No / Yes
✔ Add Pinia for state management? … No / Yes
✔ Add Vitest for Unit Testing? … No / Yes
? Add an End-to-End Testing Solution? › - Use arrow-keys. Return to submit.
    No
❯   Cypress - also supports unit testing with Cypress Component Testing
    Nightwatch
    Playwright
After selecting Cypress, it will come pre-set up for you. If you want to add Cypress to an existing project or to any other JavaScript framework, you can go here for the setup guide.
The next step after creating our app is to install dependencies for it using yarn install. For my setup, I added TypeScript. It’s possible to start without it; however, I encourage you to use it here.
Warning: I experienced some issues with TypeScript after setup; you may not experience them, but if you do, try adding "moduleResolution": "node" option to your tsconfig.app.json file.
Cypress introduction
After that, we can run yarn cypress open to open Cypress. It should open a new window for you:
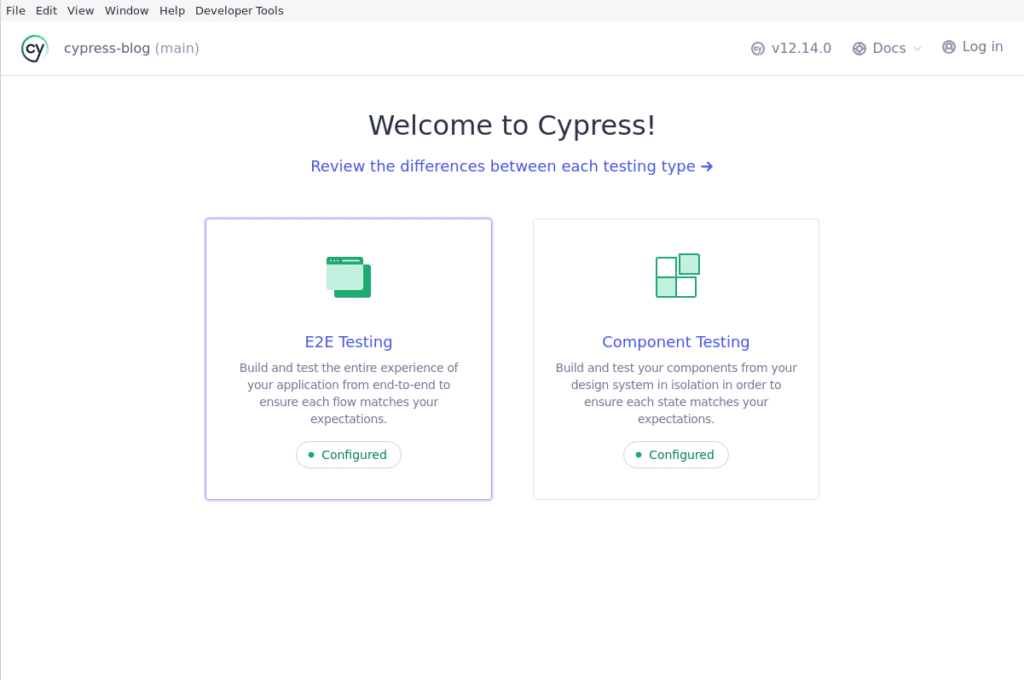
Here, we will select “E2E Testing”. Another option here is for “Component Testing” which actually works on the same systems as E2E testing but is only scoped to a single component instead of the entire website.
After clicking on “E2E Testing” you will see a window with an option to choose the browser for testing:
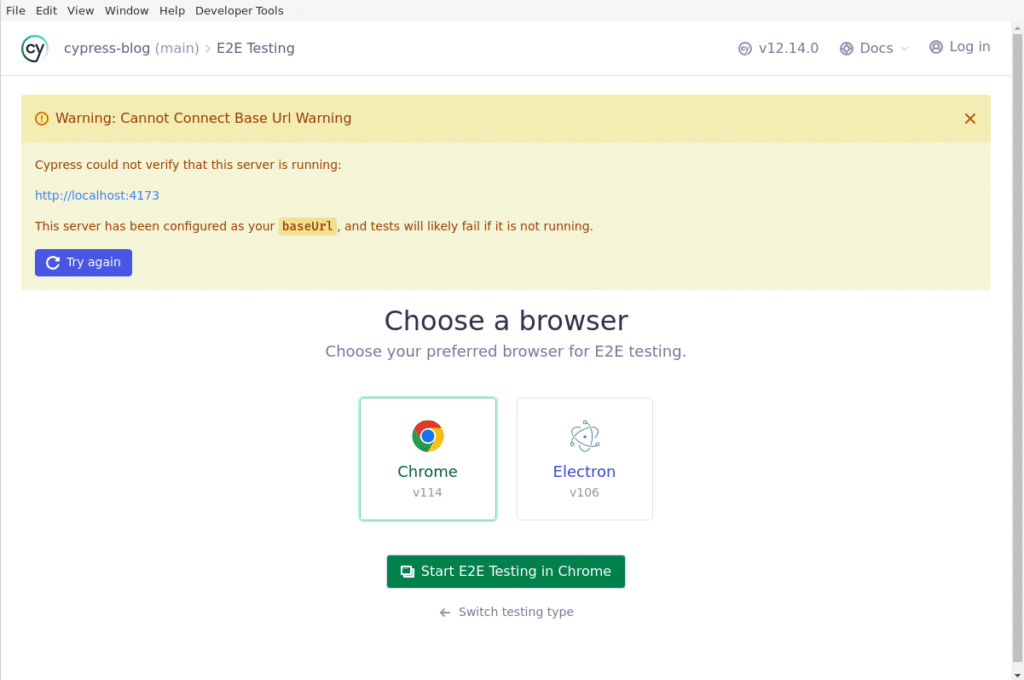
You can probably see a warning here because we haven’t started our server yet, so let’s do that by running yarn dev --port 4173 in our terminal. Worth mentioning here is that we can change base url for Cypress inside of cypress.config.ts or cypress.config.js (if you don’t use TypeScript), config example:
import { defineConfig } from 'cypress'

export default defineConfig({
  e2e: {
    // folder containing your tests
    specPattern: 'cypress/e2e/**/*.{cy,spec}.{js,jsx,ts,tsx}',
    // here you can set your url for testing
    baseUrl: 'http://localhost:4173'
  },
  component: {
    specPattern: 'src/**/__tests__/*.{cy,spec}.{js,ts,jsx,tsx}',
    devServer: {
      framework: 'vue',
      bundler: 'vite'
    }
  }
})
For comfort's sake, you may want to define a script for launching dev server and Cypress at the same time. If you set up your project as I did you should have one already predefined yarn test:e2e:dev.
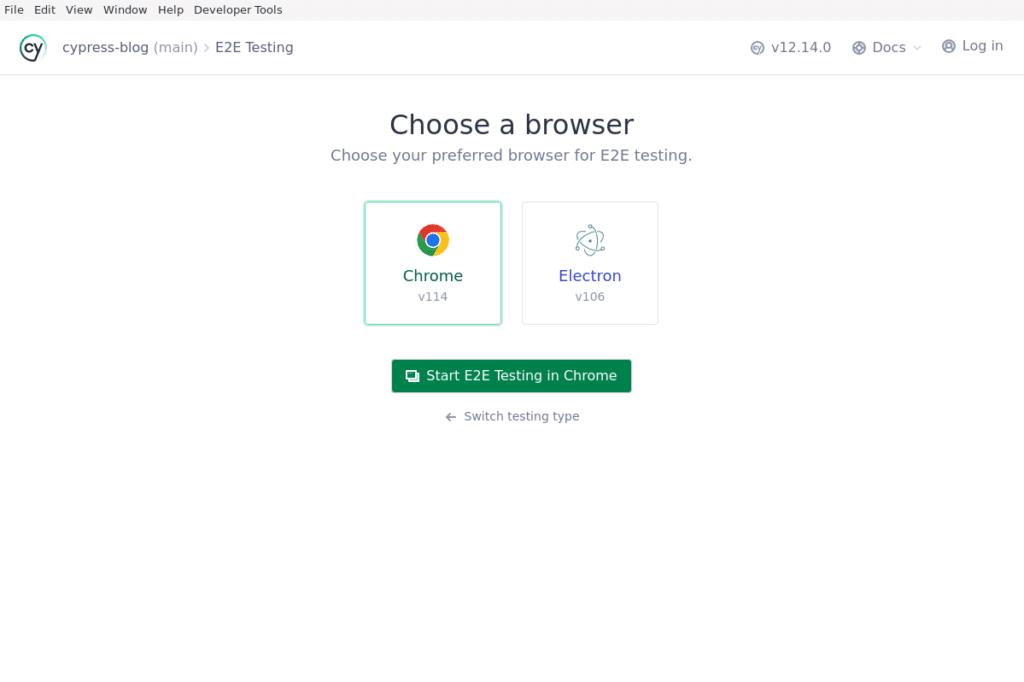
After that, we should be able to select our browser and press “Start E2E Testing in <your browser>”, Cypress should automatically find browsers you have installed on your system:
Tests basics
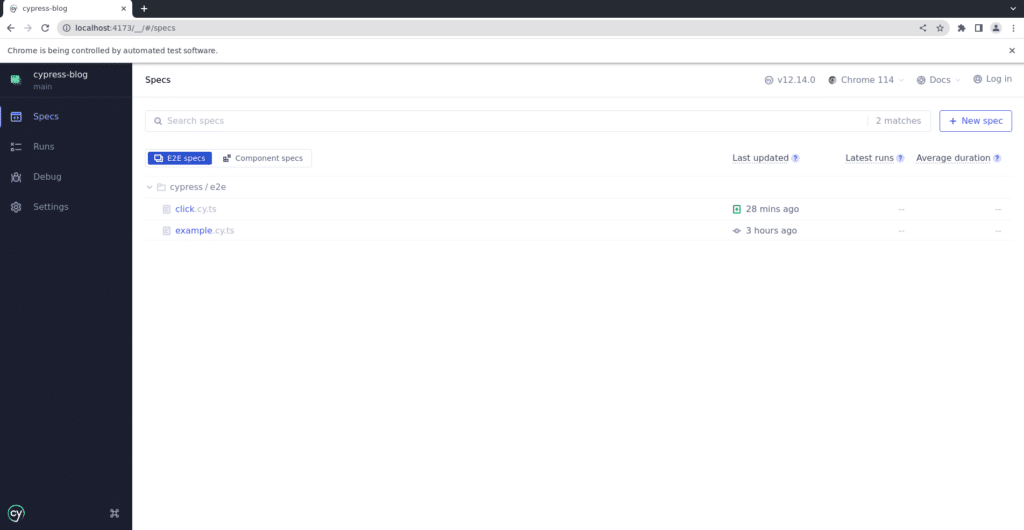
After selecting our browser, you should be able to see all your tests:
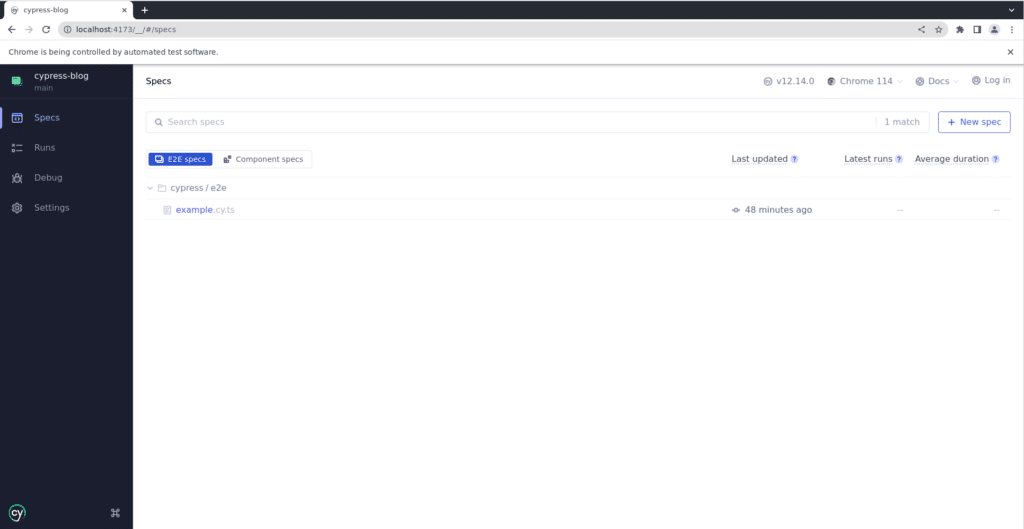
As you can see above, we have one here already (you may not have any depending on your setup). Cypress automatically finds your tests as long as these tests are located inside of cypress/e2e folder and have a correct file extension e.g., cy.ts or any other folder and extension you set inside your cypress.config.ts.
Contents of cypress/e2e/example.cy.ts:
describe('My First Test', () => {
  it('visits the app root url', () => {
    cy.visit('/')
    cy.contains('h1', 'You did it!')
  })
})
Although it’s really basic, let’s go quickly over it:
- “describe” - allows you to define a testing suite containing many tests
- “it” - defines a singular test inside of a test suite
- “cy.visit(‘/’)” - visits our base url
- “cy.contains(‘h1’, ‘You did it’)” - selects specific DOM element (here h1 tag), and checks if that element contains a specific string or regular expression (here “You did it” text)
This simple test will visit our main page and check if it contains an h1 tag with text “You did it”. Without further due, let's try running it:
As you can see above, the test goes through without any errors.
Writing basic tests
Now let’s try to focus on writing our own test. I change the content of App.vue so it looks like this:
<script setup lang="ts">
import { ref } from 'vue'

const isVisible = ref(false)
</script>

<template>
  <div class="container">
    <button @click="isVisible = !isVisible" data-e2e="show-button">show</button>

    <p v-show="isVisible" data-e2e="paragraph">Some sample text 😊</p>
  </div>
</template>

<style scoped>
.container {
  display: flex;
  flex-direction: column;
  align-items: center;
  gap: 1rem;
}
</style>
Here we have a button that toggles some text to be visible or not. Let's test if this functionality works. Firstly, we will create click.cy.ts file inside of cypress/e2e folder. It should look something like this:
describe('Toggling paragraph', () => {
  it('clicks on a button', () => {
    cy.visit('/')
    cy.get('[data-e2e="paragraph"]').should('be.not.visible')
    cy.get('[data-e2e="show-button"]').click()
    cy.get('[data-e2e="paragraph"]').should('be.visible')
  })
})
You probably noticed that I used data attributes here. It's a good practice to use data attributes with names like data-e2e, data-test or data-cy to label your components for testing. You can pick your own name, just make sure that it makes sense.
Coming back to the test at hand, it can be seen that the methods called here are actually really easy to read. It's a really nice thing because it streamlines the test writing process; however, for more clarity, let’s go step by step through it:
- cy.visit - visits our main page
- cy.get(‘<selector>’) - gets specified DOM element, parameter passed to this function is a CSS selector same one you would pass to $(‘<selector>’) from jQuery which is similar to document.querySelector(‘<selector>’) in vanilla JavaScript
- cy.get('[data-e2e="paragraph"]').should('be.not.visible') - here we get our paragraph and check if it isn’t visible
- cy.get('[data-e2e="show-button"]').click() - here we get our button and just click it
- cy.get('[data-e2e="paragraph"]').should('be.visible') - and finally we again get our paragraph and this time check if it’s visible
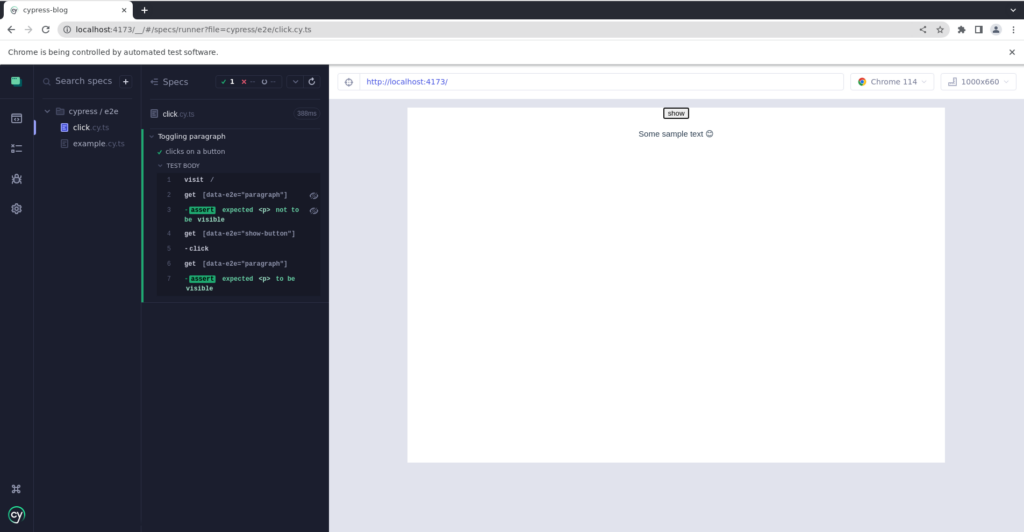
After all that, our spec should be automatically available to us in Cypress, so we can run it:
Fixtures & element organization
Now let's explore fixtures and one possible way of organizing your page elements used for testing. We will do it by writing a test that will fill in a form for us and make a fake account.
Again I updated our App.vue component, you can see how it looks on Github. After that update, our App.vue now has a basic form, which we will try to fill in with Cypress.
The first thing I advise you to do here is to move your tsconfig.json from cypress/e2e to cypress/ so TypeScript works properly across cypress/ folder, and after we will create a file cypress.d.ts inside cypress/ folder this file will look like this:
declare namespace Cypress {
  interface Chainable {
    getByTag(...args: Parameters<typeof cy.get>): Chainable
  }
}
The next step is editing our tsconfig.json:
{
  "extends": "@vue/tsconfig/tsconfig.dom.json",
  "include": ["./**/*"],
  "compilerOptions": {
    "isolatedModules": false,
    "target": "es5",
    "lib": ["es5", "dom"],
    "types": ["cypress", "./cypress"]
  }
}
And finally we will add this line to our cypress/support/commands.ts file:
Cypress.Commands.add('getByTag', (selector: string, ...args) => {
  return cy.get(`[data-e2e="${selector}"]`, ...args)
The explanation behind this process will be in the later part of this blog. After all this preparation, the first thing I will show you is a way of organizing all your element selectors. We will begin by creating a page/ folder inside our cypress/ folder, and in this folder, we will create another one called components/. Inside our components/ we will create form.cy.ts file, it will look like this:
type formInput = {
  name: string
  lastName: string
  eMail: string
  phoneNumber: string
}

const form = {
  get nameInput() {
    return cy.getByTag('form-name')
  },

  get lastNameInput() {
    return cy.getByTag('form-last-name')
  },

  get eMailInput() {
    return cy.getByTag('form-e-mail')
  },

  get phoneNumberInput() {
    return cy.getByTag('form-phone-number')
  },

  get submit() {
    return cy.getByTag('form-submit')
  },

  get message() {
    return cy.getByTag('form-message')
  },

  fillForm({ name, lastName, eMail, phoneNumber }: formInput) {
    this.nameInput.type(name)
    this.lastNameInput.type(lastName)
    this.eMailInput.type(eMail)
    this.phoneNumberInput.type(phoneNumber)
  }
}

export default form
As you can see, we create an object here with getters for a few properties, and with these getters, we are returning our newly created cy.getByTag. All previous actions were done so we have access to that function which will pre-wrap our selectors in a data attribute so cy.getByTag('form-name') would be equivalent to cy.ge('[data-e2e="form-name"]'). Another thing we did here is the creation of a fillForm method on our object, it takes formInput as an input and will use our newly created properties to fill in our form.
Now we could probably use our form object as it is to write our test, but I’d like to give it all a bit more structure. One thing I will say now is that this whole thing is a bit overkill for this example, but at a bigger scale, it’s a really welcomed addition. Thus, another step after creating form will be creating a home.ts file inside our cypress/pages/ folder, it will represent our “home page”:
import form from './components/form'

const home = {
  get form() {
    return form
  },

  visit() {
    return cy.visit('/')
  }
}

export default home
It’s pretty basic, but it’s all that we currently need. On an actual project, your home page will most likely have more content so all this would organize it nicely for you.
Now we will create index.ts file in cypress/pages/ folder, it will be a file inside of which we organize all our pages, inside a bigger project besides home.ts you would probably have other files representing other pages. Contents of index.ts:
import home from './home'

const page = {
  get home() {
    return home
  }
}

export default page
Here we only have a getter for our home but as I said before, bigger projects will have more pages and for each page, you should add a separate getter and a file representing it.
Now we can finally write our test, we will create a new file and name it make-account.cy.ts:
import page from '../pages/index'

before(() => {
  cy.fixture('example').then((fixture) => {
    cy.fixtures = fixture
  })
})

describe('Make an account', () => {
  it('should make an account', () => {
    page.home.visit()
    page.home.form.fillForm(cy.fixtures)
    page.home.form.submit.click()
    page.home.form.message.should('be.visible')
  })
})
Before we start analyzing what the actual test does, we will focus on our before() function. It is a function that is called before we run our test, but what is actually important here is what happens inside it. Inside our before function, we are loading our fixtures. By that I mean mock/fake data we will use for our test. First thing we do is call the cy.fixtures() function with a string parameter which refers to a file inside of fixtures/ folder, here by just typing “example” we are referring to cypress/fixtures/example.json file. Our example.json file should be already created (if not you can create your own), but for our purposes, we will alter it to look like this:
{
  "name": "Jan",
  "lastName": "Nowak",
  "eMail": "jan.nowak@example.com",
  "phoneNumber": "123456789"
}
It’s a mock data we will use to fill in our form.
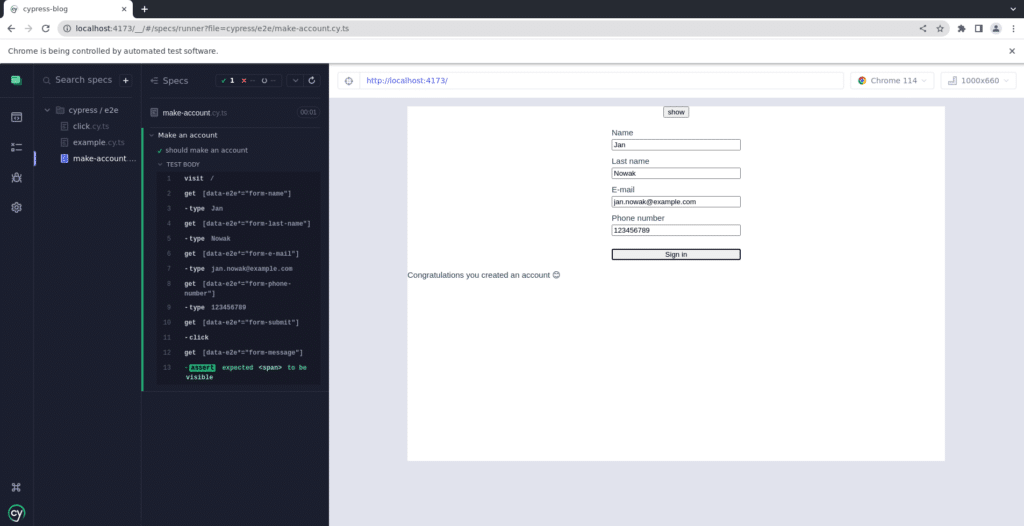
Now because we did all the hard work before writing our test is a breeze, we can just call page.home.visit() to visit our “home page” and then call page.home.form.fillForm() and pass to it or fixtures from global cy object to fill in our form. We also have access to all our properties we created on form and home like submit and message.
Now we can just run our test, and it should run without any issues:
Summary
After reading this article, I hope you are ready to write your own tests, and all of that wasn’t too hard for you to understand. In my opinion, writing actual tests isn't that hard, and one cumbersome thing is all the pre-setup you have to do. The method I showed here for organizing your elements is really helpful because it makes your cy.ts files way slimmer and separates all the boilerplate code to separate files, you, of course, don’t have to use it. However, I think it really helps with code clarity.
This article doesn’t cover all there is to know about Cypress, it's only an introduction to it, but if you want to learn more you can always visit Cypress docs to learn more about the topic.
<div class="ml-form-embed"
data-account="2253895:i2a9g5f0y9"
data-form="5911792:o7h9l2">
</div>

